CLICK HERE FOR FREE BLOGGER TEMPLATES, LINK BUTTONS AND MORE! »
Showing posts with label trendy twine design team. Show all posts

Tuesday, March 6, 2012

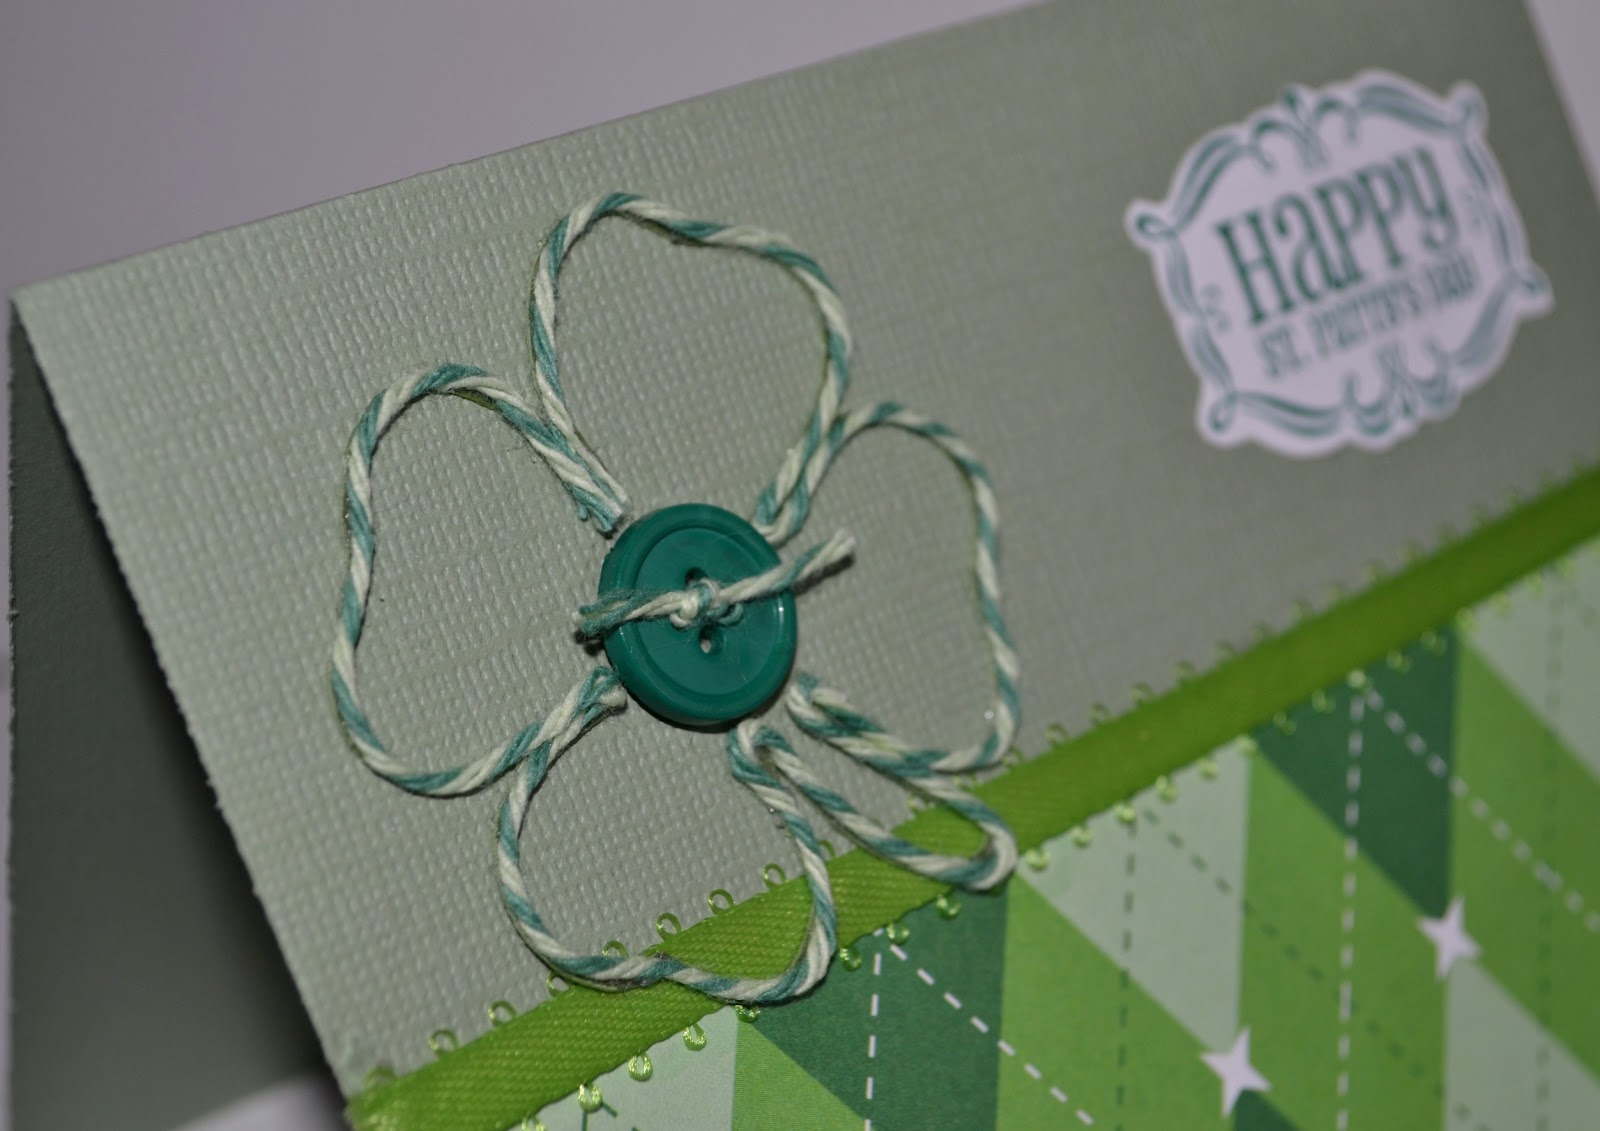
St. Patty's Day Card

My latest Trendy Twine design team project features some lovely Twisted Lime twine on a St. Patrick's Day card.


 I used a thin outline of a shamrock I cut out with my Silhouette and Make the Cut as a template and lined it with the Twisted Lime twine so I would have a perfect shamrock rather than one I would have come up with which would have looked like a kid made it. 

Check out Trendy Twine's blog for the rest of the St. Patrick's Day projects made and also for details on this month's challenge!  Don't miss out on your chance at winning 50 yards of twine!!   

Tuesday, February 7, 2012

Trendy Twine Tuesday

It's a another fabulous Trendy Twine Tuesday where the entire Trendy Twine design team shows you their creations using a specific color of twine.  The twine of choice for these projects is Strawberry Cupcake which is a pink and white twine.  To get into a little more detail, the twine is 4-ply and is twisted with dark pink, light pink, and white. 

My project, which I made for a friend's baby shower features both Strawberry Cupcake and Twisted Lime.


To see all the Trendy Twine projects visit Trendy Twine's blog which is linked HERE.

Sunday, January 22, 2012

Vibrant Layout

Wow, it's good to be back!  I explained a little in my last post about why I've been away for so long but it seems I am back now (and hope to stay back)!  Yay!  I have missed crafting so much.  Last night my husband came home and saw me working away in my craft room and commented on the fact that I was actually crafting.  He was happy to see me feeling much better and able to do what I love to do.

So this past Tuesday was my DT day for Trendy Twine but unfortunately due to unforeseen circumstances, I was unable to work on a project.  I felt HORRIBLE but the awesome owner and DT were very accomodating toward my situation and I was given a free pass.  Well, I thank them for that but I felt bad about it so I made up my day!


I have actually been working on this layout for almost two months now.  Yea, crazy right?  Well, since I haven't been feeling well it just kind of sat on my craft table for most of that time collecting dust and waiting for me to finish it.  Finally last night I was able to.


I used Trendy Twine's Valentine's Cherry Cupcake twine to "hang" the little banner.  I also used the same twine in the center of the flower.  I felt the flower was naked so I decided to dress it up by adding some twirled Cherry Cupcake twine.  As you can see, this is not a Valentine's project so just keep in mind that the Cherry Cupcake twine can be used for ANY occasion. 

I used Unity Stamp's Time for Travel stamps and Epiphany Crafts Shape Studio tools to make the epoxy embellishments on the banner.  I also used the Unity Stamps itty bitty collection of Echo Park Banners stamps for the three sentiment banners.

Ooh, I am entering this layout in DCWV's Stack-a-holic Template Challenge.  Wish me luck...I saw some serious competition on their FB page!!!  The layout template is from Sketch Savvy.  

Before I let you go I wanted to let you know that Trendy Twine has two new colors available now!  You can get them in spools and also in a mini pack.    


Stay tuned....Trendy Twine has more colors debuting this year!

Tuesday, January 3, 2012

Trendy Twine Tuesday

Welcome to a new year!  I hope you all had a great Christmas and New Years.  I can't believe we're already in 2012!  For me 2012 marks the start of my Trendy Twine design team stint.  Woohoo!  I am so excited for that.  Today I have my very first official Trendy Twine project for you. 

This month we are featuring the Cherry Cupcake twine that I know you will fall in love with!  First off it's perfect for your Valentines Day projects and second, it's just super super cute twine for any project!  Here's what I made.


As you can see I definitely made good use of that yummy Cherry Cupcake twine.

To apply the twine n a lattice design I marked the edges of the entire card at 1/2" increments with pencil.  I then set out playing connect the dots...well, that's pretty much how it went.  From one mark at the top down to the corresponding mark at the bottom.  I used glue dots to adhere each piece to the edge of the card.  Also, for the second row (that crisscrosses) I adhered it to the glue dot that was already there from when I adhered the first layer of twine.  I hope that made sense.  Look at the bottom pic to get an idea of how they are attached.

I hope you enjoyed this project and come back to visit for all my other Trendy Twine projects!!  Oh and of course make sure you hit all the other Trendy Twine DT projects that are featured today (they are awesome)!  You can find the blog HERE.

Friday, December 2, 2011

Twine Ornaments


I mentioned awhile back that I would be starting my stint on Trendy Twine's design team in January.  Well, they have graciously asked me to post as a guest designer this month.  Of course I said yes!  

For my first Trendy Twine project I decided to make something a little different than I normally make, ornaments made out of twine! Oh yea, you can make some pretty stuff with twine!  It's a perfect project to do with the kids.


I made some in traditional colors.....


Peppermint Stick Twine

Twisted Lime Twine w/a hint of Peppermint Stick


And some in not-so-traditional colors....


Blueberry Twine

Blue Berry Twine
My husband helped me make them.  He thinks his is better!  Hmmph.  He really enjoyed making them and actually sad he wants to make more.  Crazy...my husband want to help me with a craft project?!  Unheard of!   

 I was thinking of glittering up these babies but decided against it since it may hide the pretty twine and unfortunately I didn't think to adorn these with pretty buttons or other embellishments until after I took these pictures (you know how time-consuming that is!) so here they are in all their naked glory.  I think adorned or not they are super cute.

Keep on reading to learn how to make these cute and simple ornaments!


HOW TO:

Ingredients
  • Small water balloons (yea, I made a mistake and used bigger balloons.  Unless you want giant ornaments or to use a ton of twine then use water balloons.) 
  • White glue
  • Water
  • Small bowl
  • Trendy Twine
  • Wax paper
  • Ribbon
  
1. Blow up balloons to to desired size and tie ends.
2. In a small bowl make a solution of 2 parts glue and 1 part water.
 
3. Coat the twine with glue and squeeze out the excess.
4. Wrap twine around balloon in in desired pattern, leaving some openings all around.
5. Lay twine ball ball on wax paper to dry and rotating every few hours to allow all sides to dry.
6. When completely dry, pop balloon and remove the deflated balloon from an opening in the cording.
7. Loop ribbon or additional twine through an opening in the ornament to hang.
8.  Embellish with glitter, buttons, etc.


You can use multiple colors of twine to make it a colorful and even more interesting!

I hope you try it out.  There's so much you can do to decorate these and pretty them up some more.  They'll look great on your tree and you can color coordinate them to match your decor!  Actually you can even throw these in a bowl or something and place in the middle of a table as decor.

ENJOY!!

P.S. If you try this out I would love to see your creations!


~Kasi