One thing I am grateful for are the amazing friends I have. I truly have surrounded myself with awesome people, all of whom I've known for many years and go as far back as junior high. Each friendship began at different times in my life and while I've been at different stages in growing as a person. Each friendship has held strong and I am so thankful for the support they give me in my times of need. I made my latest SVG Attic design team project with this in mind and of course because of the time of year.
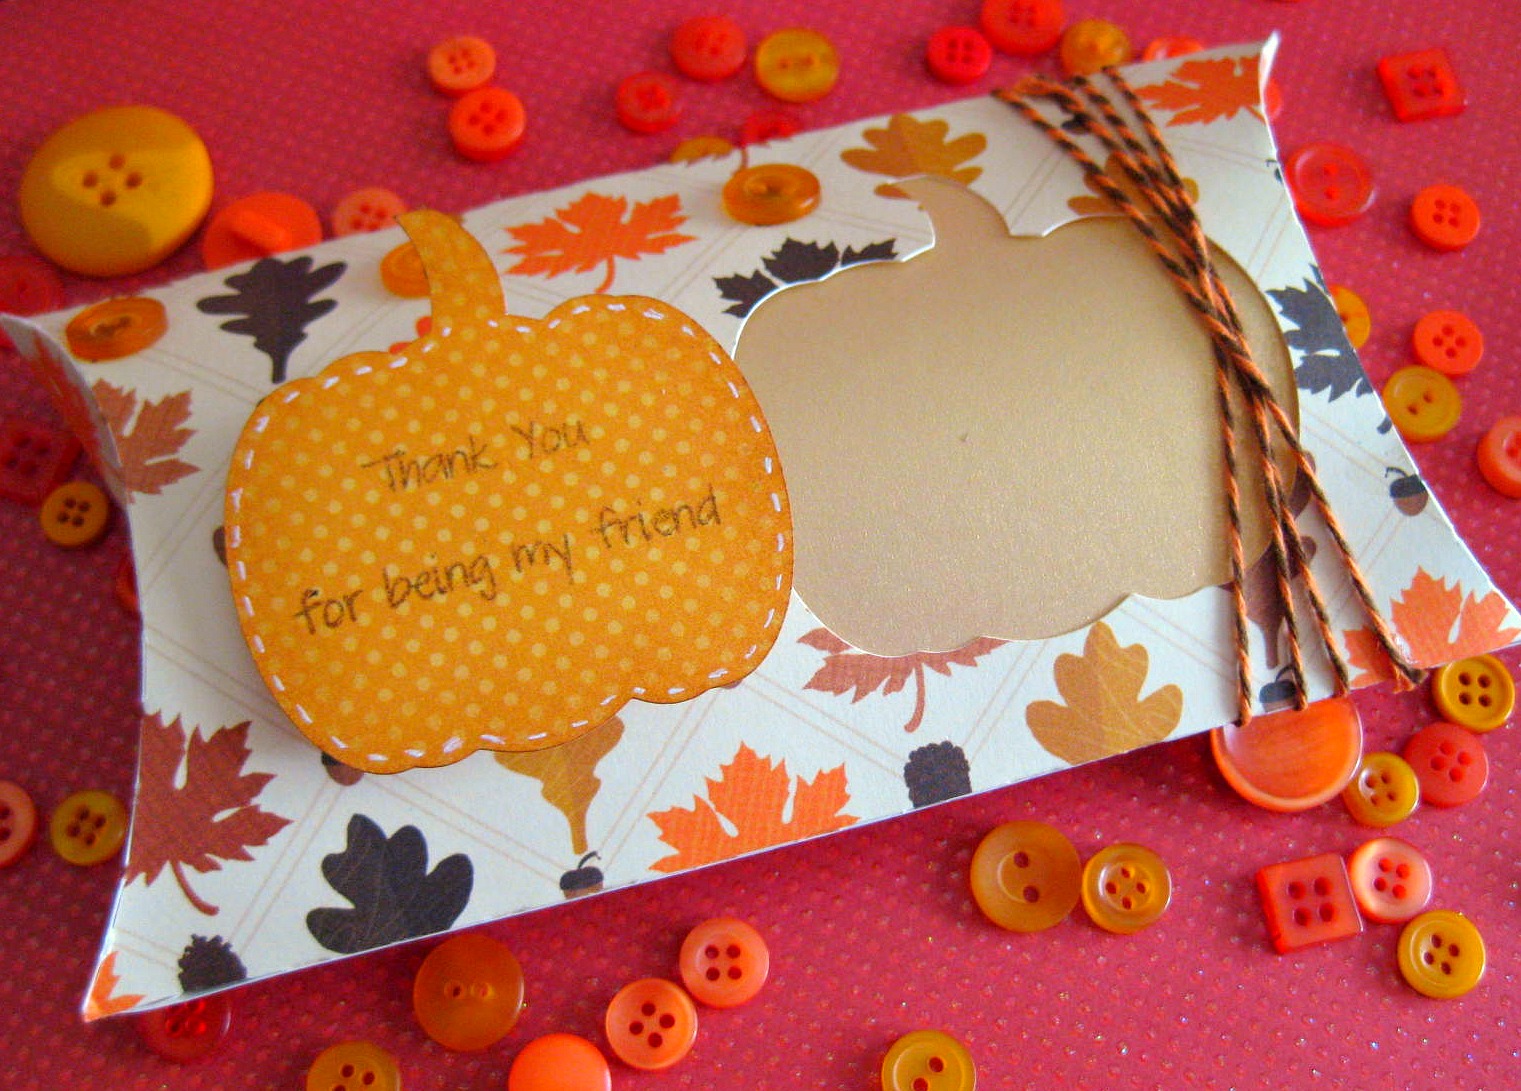
For this pillow box I used SVG Attic's Holiday Cheer Gift Boxes SVG collection which has some really really cute gift boxes. In it you get the pillow box I used, Santa's sleigh, an ornament bag, and a gift card holder. Perfect for the holidays.
I also used the Pumpkin Patch SVG collection from SVG Attic to make the cutout of the pumpkin and the pumpkin die cut. The cutout is backed with gold vellum. I used a white gel pen to add "stitching" to the pumpkin die cut.
The right side is adorned with some Orange Truffle twine from Trendy Twine. You can also find them on Etsy HERE. Please note that the shop is closed until November 28th (vacation).
The sentiment is from My Thoughts Exactly's Many Thanks stamp set. MTE stamps are for sure my favorite sentiment stamps around. The quality is better than other stamps I have tried and they don't get discolored! Also, the sentiment stamps super sharp and clearly.
I added some orange buttons I bought for $2 at the Scrapbook Expo last weekend. The store is called Scrapbuck. They have some pretty good deals and free shipping right now with a $20 purchase.
The paper is from DCWV's Harvest Gathering Stack. Did you hear they are opening a DCWV Deals website? Look for that in the near future. I am super excited to stock up on paper stacks that they don't sell around here anymore.
Enjoy your weekend and have a great Veteran's Day. Remember to thank a veteran!
Showing posts with label gift. Show all posts
Friday, November 11, 2011
Fall Pillow Box
Labels:
3D,
Autumn,
Christmas,
design team,
dt,
Fall,
gift,
mte,
my thoughts exactly,
pillow box,
svg attic,
Thanksgiving,
trendy twine
Tuesday, September 6, 2011
More Decoupage Tile Coasters
Decoupage coasters, I love them! I like making them and they turn out so pretty!! I love that I can customize them to fit pretty much any decor. Here's a fresh new set I made.
Labels:
ceramic,
decoupage,
etsy,
gift,
housewarming,
Mod Podge,
tile coasters
Monday, September 5, 2011
Mod Podge Tile Coasters
I have been seeing tile coasters all over Pinterest lately and it has piqued my interest. I think they are the coolest things. I looked into how to make them and it's fairly easy. You need some tile coasters, Mod Podge, acrylic sealer, and a backing for the coasters so it doesn't scratch your table, and paper. I set to work on these babies last night and let them sit over night to dry. They dry fairly quickly.
What do you think? Cute right?
Supplies:
Ceramic Tiles (4.25" x 4.25" tiles cost me $0.14 - $0.16 each at Home Depot)
Paper (it can be napkins, gift wrap, scrapbook paper, any type really)
Mod Podge
Acrylic sealer (I bought clear gloss acrylic wood finisher from Home Depot)
Felt pads (you can use foam or other types of backing as well)
Instructions:
I cut squares of scrapbook paper from the DCWV Citrus Stack into 4.25" x 4.25" squares to fit onto the tiles.
Apply a coat of Mod Podge to the tiles and placed the paper on top. Let dry for 15 minutes.
Apply a thin coat of Mod Podge on top of the paper. Let dry for 15 minutes.
Repeat 2-3 times.
Spray with acrylic sealer. Let dry for 30 minutes.
Repeat 3 times or according to directions on can.
Adhere felt pads to back of coasters.
That's it! Now you have super cute coasters to use or give as gifts!
What do you think? Cute right?
Supplies:
Ceramic Tiles (4.25" x 4.25" tiles cost me $0.14 - $0.16 each at Home Depot)
Paper (it can be napkins, gift wrap, scrapbook paper, any type really)
Mod Podge
Acrylic sealer (I bought clear gloss acrylic wood finisher from Home Depot)
Felt pads (you can use foam or other types of backing as well)
Instructions:
I cut squares of scrapbook paper from the DCWV Citrus Stack into 4.25" x 4.25" squares to fit onto the tiles.
Apply a coat of Mod Podge to the tiles and placed the paper on top. Let dry for 15 minutes.
Apply a thin coat of Mod Podge on top of the paper. Let dry for 15 minutes.
Repeat 2-3 times.
Spray with acrylic sealer. Let dry for 30 minutes.
Repeat 3 times or according to directions on can.
Adhere felt pads to back of coasters.
That's it! Now you have super cute coasters to use or give as gifts!
Labels:
ceramic,
dcwv,
decoupage,
gift,
housewarming,
Mod Podge,
tile coasters
Friday, July 22, 2011
New Take on a Simple Project
Well well, the day is finally here. It's my SVG Attic design team project day! Woohoo!! I look forward to these days. As I mentioned in my Christmas in July post earlier this week I am obsessed with bookmarks all of a sudden. That project was a bookmark and guess what today's project is.
Any guesses?
You guessed correctly! It's a bookmark!
Before you think to yourself, "Not another one, you just made one" let me explain. These (yes, plural) are not the normal everyday bookmarks you see. They are different than the one I made earlier this week. Anyway, I have issues with making the same thing twice. I get bored very easily so I am always on the hunt for new ideas, new techniques, new anything so these are different. They serve the same purpose but have a different design. What? You want me to shush already and see some pictures? OK, here ya go!
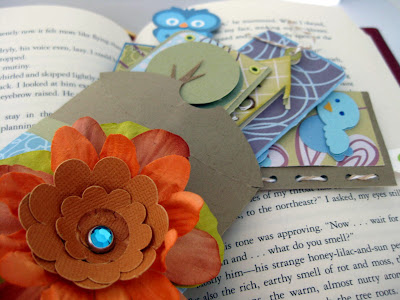
They look like ordinary bookmarks don't they? So can you figure out what's different about these? Betcha can't......not yet at least. Here's some *action* shots!
How cool is that? They are so easy to make too! Here's a picture of the first one I made. A very simple one for my daughter which really only took a few minutes to whip together.
I used a piece of cardstock, a piece of patterened paper, and some eyelets. Telling ya, super easy!
On to the nitty gritty of how I made these little guys!
As mentioned above, I used a piece of cardstock and a piece of patterened paper as the base for each bookmark. From there I used my little creative brain to make each one different. Each bookmark is 2" in width and 3.25" in height when folded and 4" x 6.5" unfolded. The cardstock is folded in half like a card but you open it on the opposite side. You can make the bookmark open up the other way as well. The left side and top of each is secured so that only a small slit is created into which you can slide the book page into. I decided to secure each differently so you can get some ideas. I'll detail each one individually.
1. Tweet Tweet
I used the Birds and Bees Collection from SVG Attic which you can get HERE. I sized the birdies down in MTC to fit the bookmark and they are about 1.5" by 1" each. The sentiment stamp comes from the coordinating stamp set from My Thoughts Exactly called Birds and the Bees which you can get HERE. The patterned paper is ColorBok which I bought from the Target dollar bin. In fact all the paper is from the same pack. Oh, and guess what I found out! ColorBok has a warehouse not too far from me where they have clearance sales from time to time! Yay me! The twine I used to secure the left side is called Krazy for Kraft from Trendy Twine which you can purchase HERE. I punched holes in the side and threaded the twine through. The looped ribbon at the top is looped and is from American Crafts.
Any guesses?
You guessed correctly! It's a bookmark!
Before you think to yourself, "Not another one, you just made one" let me explain. These (yes, plural) are not the normal everyday bookmarks you see. They are different than the one I made earlier this week. Anyway, I have issues with making the same thing twice. I get bored very easily so I am always on the hunt for new ideas, new techniques, new anything so these are different. They serve the same purpose but have a different design. What? You want me to shush already and see some pictures? OK, here ya go!
| Set of four bookmarks |
| Pillow box |
| There's something a little different about these bookmarks |
| Tweet Tweet |
| Who Who |
They look like ordinary bookmarks don't they? So can you figure out what's different about these? Betcha can't......not yet at least. Here's some *action* shots!
| Corner bookmarks |
| The paper slips through an opening on the right. |
| Slip the book page right in there |
I used a piece of cardstock, a piece of patterened paper, and some eyelets. Telling ya, super easy!
On to the nitty gritty of how I made these little guys!
As mentioned above, I used a piece of cardstock and a piece of patterened paper as the base for each bookmark. From there I used my little creative brain to make each one different. Each bookmark is 2" in width and 3.25" in height when folded and 4" x 6.5" unfolded. The cardstock is folded in half like a card but you open it on the opposite side. You can make the bookmark open up the other way as well. The left side and top of each is secured so that only a small slit is created into which you can slide the book page into. I decided to secure each differently so you can get some ideas. I'll detail each one individually.
1. Tweet Tweet
I used the Birds and Bees Collection from SVG Attic which you can get HERE. I sized the birdies down in MTC to fit the bookmark and they are about 1.5" by 1" each. The sentiment stamp comes from the coordinating stamp set from My Thoughts Exactly called Birds and the Bees which you can get HERE. The patterned paper is ColorBok which I bought from the Target dollar bin. In fact all the paper is from the same pack. Oh, and guess what I found out! ColorBok has a warehouse not too far from me where they have clearance sales from time to time! Yay me! The twine I used to secure the left side is called Krazy for Kraft from Trendy Twine which you can purchase HERE. I punched holes in the side and threaded the twine through. The looped ribbon at the top is looped and is from American Crafts.
2. Pretty Tree
The tree is from Give a Hoot SVG Collection from SVG Attic and is sized to just under 1.75" x 3". The sentiment stamp is from the My Thoughts Exactly Birds and the Bees stamp set. I secured the left side of the bookmark with eyelets that I set using a Crop-a-Dile. I criss-crossed some brown bakers twine from Trendy Twine around the trunk of the tree.
3. Hoot Hoot
The owl is from SVG Attic's Give a Hoot Collection. I welded him to the top of the bookmark in MTC. To make sure he's stable it's best to weld him at equal intervals on the full length of the bookmark (unfolded) in MTC and then fold together when cut. If you don't you have a poor owl that is falling off his perch! He's 1.25" x 1/5". The sentiment stamp comes from My Thoughts Exactly Birds and the Bees stamp set. I sewed the left edge and top together using a sewing machine.
4. Birdie House
The birdhouse comes from the Birds and Bees Collection at SVG Attic and is 1.5" x 2". I looped the brown twine around where the bird house entrance holes are and looped some of the lighter brown twine at the top. The twine is from Trendy Twine. Hmm, are you seeing a *trend* with the twine? Yes, I LOVE their twine! To secure the side and top I glued the bookmark edges.
That about does it...sort of. Just one more element to talk about. The pillow box!
To fit the bookmarks in the pillow box I had to size the box in Silhouette Studio to just about 7.5" x 7.5". I folded up the pillow box along the scored lines and went on my merry way decorating it. I used the flower from the Mad Tea Party Kit SVG Collection from SVG Attic. I centered it on three different paper flowers and topped it off with a blue jewel brad. I used a strip of cardstock and a strip of patterned paper around the pillow box and wrapped some green twine from Trendy Twine around it as the finishing touch.
OK, really that is it! Whew, that was long! Now to figure out who to give this to!
Labels:
birdhouse,
bookmark,
gift,
mte,
my thoughts exactly,
nature,
owl,
pillow box,
present,
svg attic,
tree,
trendy twine
Subscribe to:
Posts (Atom)