I have always struggled with trying to efficiently clean my cutting mats whether it's the Cricut mat or the Silhouette mat. I NEVER was able to get all the goo off until now!
I re-stick my mats with a chisel Zig Pen and it works great but it is a pain in the butt to get the glue off when I need to clean it and re-stick. My mats are a huge ugly mess of old glue and grossness. I tried the soap approach to no avail. Baby wipes didn't work. I also tried the Goo Gone or whatever that pungent smelling stuff is. All it did was give me a headache, stink up the house, and eat up the printed lines on my mat. Big huge fails! Today I discovered the answer to cleaning my mats...baby oil! Seriously. No joke!! I just tried it and it took some scrubbing (probably from a years worth of glue stuck on the mat) but it worked!
I put some drops of baby oil on the mat and spread it out by rubbing it into the glue. I let it sit for a few minutes then added soap and scrubbed with a scrub sponge. The glue came off!! I really wasn't expecting that to happen. I am so happy to have finally found a solution that is cheap and super easy!
I would have taken pictures but my mats were so embarrassingly gross that I couldn't bring myself to post pictures of the before. Anyway, if you try it let me know if it worked for you!
*UPDATE*
I noticed that the glue definitely came off but then stuck to my scrub sponge. I had to keep peeling it off. Also, because I have so many layers of glue on my mat it took some serious effort for me to scrub the glue off. Not sure how much scrubbing is needed for just one layer. It took most of the glue out but I'm tired of scrubbing so there's still some on my mat but it's much much cleaner than it was before.
Monday, September 10, 2012

Sunday, August 26, 2012
Fun Beach Layout
Hi guys!! It's been a long long time since I lasted posted anything here. May was my last post and before that...uhhh...no clue. I have a good excuse though. I really do. We welcomed a baby girl into our family earlier this month. I pretty much lost all interest in crafting and all other hobbies I once enjoyed throughout my pregnancy. I did a few pages here and there but not much else. OK, enough about that, let me show you a layout I completed this week.
I'm still working on pictures from our last three vacations to Hawaii. I finally got all the pictures printed now just working on getting pages cranked out so I can move on.
Ahem, I will not tell you which one I am....chunky or skinny chick.


I used:
-Echo Park's Splash paper collection.
-The cute poxy buttons happen to be Epiphany Craft's Shape Studio Round 25.
-The stamps are from Unity Stamp Co.
-I purchased the fishies that you see lined up in the center of the page from the Silhouette online store and printed them out so I can add some more cool Echo Park images to my page without having to cut up more of the pretty paper!
-Oh and I can't forget Trendy Twine! I used the Sew Easy to stitch a teal border along the right top corner of my page (Did I just see a guide to sew in circles??? Wahhh? Gotta have!). I used Trendy Twine's new Tickled with Teal bakers twine. Psst, they have a lot of awesome new colors in the store!
There will be more posts up. I promise. I made a few other pages over the month that I haven't showcased yet.
I'm still working on pictures from our last three vacations to Hawaii. I finally got all the pictures printed now just working on getting pages cranked out so I can move on.
Ahem, I will not tell you which one I am....chunky or skinny chick.


I used:
-Echo Park's Splash paper collection.
-The cute poxy buttons happen to be Epiphany Craft's Shape Studio Round 25.
-The stamps are from Unity Stamp Co.
-I purchased the fishies that you see lined up in the center of the page from the Silhouette online store and printed them out so I can add some more cool Echo Park images to my page without having to cut up more of the pretty paper!
-Oh and I can't forget Trendy Twine! I used the Sew Easy to stitch a teal border along the right top corner of my page (Did I just see a guide to sew in circles??? Wahhh? Gotta have!). I used Trendy Twine's new Tickled with Teal bakers twine. Psst, they have a lot of awesome new colors in the store!
There will be more posts up. I promise. I made a few other pages over the month that I haven't showcased yet.
Monday, May 14, 2012
Firestarter Layout
As promised on my FB page I have made it over here to post a picture of my latest scrapbook layout. I made this layout for the DCWV Template Challenge for the month of May.
A little backstory on the pictures. For our honeymoon my husband and I went to Hawaii. We decided to do all the touristy things and one of those things was to go to the Polynesian Cultural Center on the Island of Oahu. We did the whole nine yards there, Luau (you may have seen layouts of pics from the Luau), activities, evening show, etc.
In the pictures for this particular layout my husband had been chosen as one of two guys to compete to start a fire by hand. Being the Eagle Scout & pyro that my husband is he was pretty darn excited. He gets to play with fire!! Unfortunately I didn't print some of the other in-between pics where the fire lit but the top pic is of him starting to light the fire by some means that did not include matches. My husband was awarded the winners crown of leaves and a flower because he smoked the guy (pun intended)! He had his fire lit in a matter of seconds while the other guy had trouble getting it lit which leads me to the next two pictures.
In the bottom two pictures my husband is, well....posing which he does quite often for any reason he can find, then dancing a hula dance. It was an interesting sight. I married a goof ball.

A little backstory on the pictures. For our honeymoon my husband and I went to Hawaii. We decided to do all the touristy things and one of those things was to go to the Polynesian Cultural Center on the Island of Oahu. We did the whole nine yards there, Luau (you may have seen layouts of pics from the Luau), activities, evening show, etc.
In the pictures for this particular layout my husband had been chosen as one of two guys to compete to start a fire by hand. Being the Eagle Scout & pyro that my husband is he was pretty darn excited. He gets to play with fire!! Unfortunately I didn't print some of the other in-between pics where the fire lit but the top pic is of him starting to light the fire by some means that did not include matches. My husband was awarded the winners crown of leaves and a flower because he smoked the guy (pun intended)! He had his fire lit in a matter of seconds while the other guy had trouble getting it lit which leads me to the next two pictures.
In the bottom two pictures my husband is, well....posing which he does quite often for any reason he can find, then dancing a hula dance. It was an interesting sight. I married a goof ball.

Materials used:
DCWV Tahiti Stack
Trendy Twine - Twisted Lime
Epiphany Crafts Shape Studio - Round 25
Crop-a-Dile to set eyelets
Prima flowers (I think)
Unity Stamp's "Time For Travel" set
Silhouette SD to print and cut title
Hope you enjoyed my little story. I have another layout for you to see in the next few days and I am working on finishing up another. I just may be back in the game......
Saturday, May 12, 2012
Stationary Box
I know it's been quite some time since I've posted. In fact it's been just as long since I've really made anything! Oh wait, I did make some wall art. I will have to post that soon.
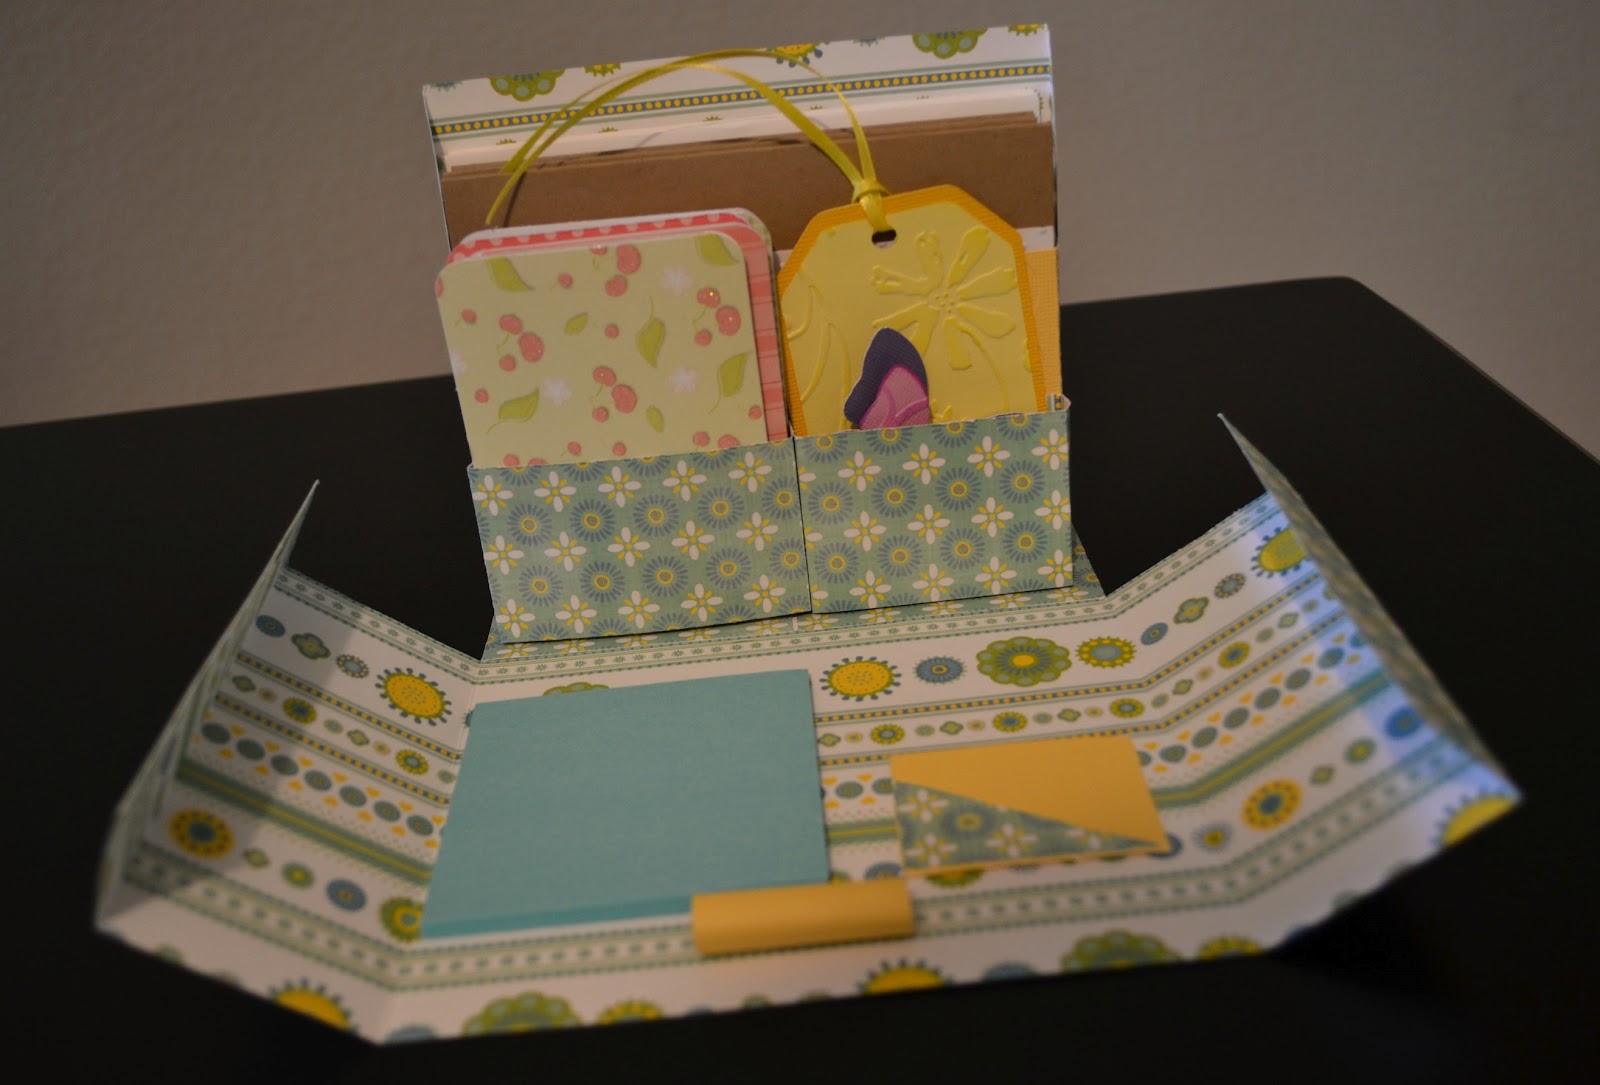
I was inspired by Alyssa's (from My Thoughts Exactly) project from last Saturday. She made the cutest stationary set. Now I have been wanting to make a greeting card box forever and it dawned on me that it would be a cute gift to give to my mother this Mother's Day so I went on the hunt for a greeting card box tutorial. I was expecting to do something really simple to just put cards in but I stumbled across Alyssa's project and loved it. Psst, she has instructions on her site.

 |
| Trendy Twine and cute buttons adorn the lid |
 |
| Ta daa! |
 |
| A2 sized cards are held in the biggest compartment in the back |
 |
| Tags and mini note cards |
 |
| Post it Notes |
 |
| Stamp holder & pen holder |
This stationary box holds A2 sized cards and envelopes. I added some mini note cards and envelopes for them as well as some tags. Also featured on the fold down flap are some Post it Notes, a stamp holder and a pen holder. All in one stationary set!
I totally forgot to take a pic of the box with just the top off but with the box shape still in tact. Boo to me!! Anyway, when you take of the top of the box you bring down the front panel to reveal all the goodies, It's such a cool set! Love it.
Tuesday, March 6, 2012
St. Patty's Day Card
My latest Trendy Twine design team project features some lovely Twisted Lime twine on a St. Patrick's Day card.
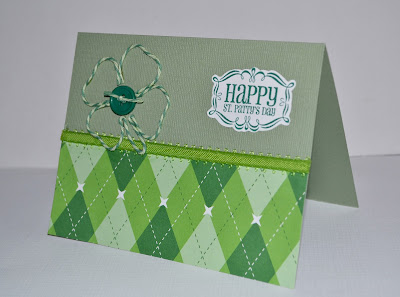

I used a thin outline of a shamrock I cut out with my Silhouette and Make the Cut as a template and lined it with the Twisted Lime twine so I would have a perfect shamrock rather than one I would have come up with which would have looked like a kid made it.
Check out Trendy Twine's blog for the rest of the St. Patrick's Day projects made and also for details on this month's challenge! Don't miss out on your chance at winning 50 yards of twine!!

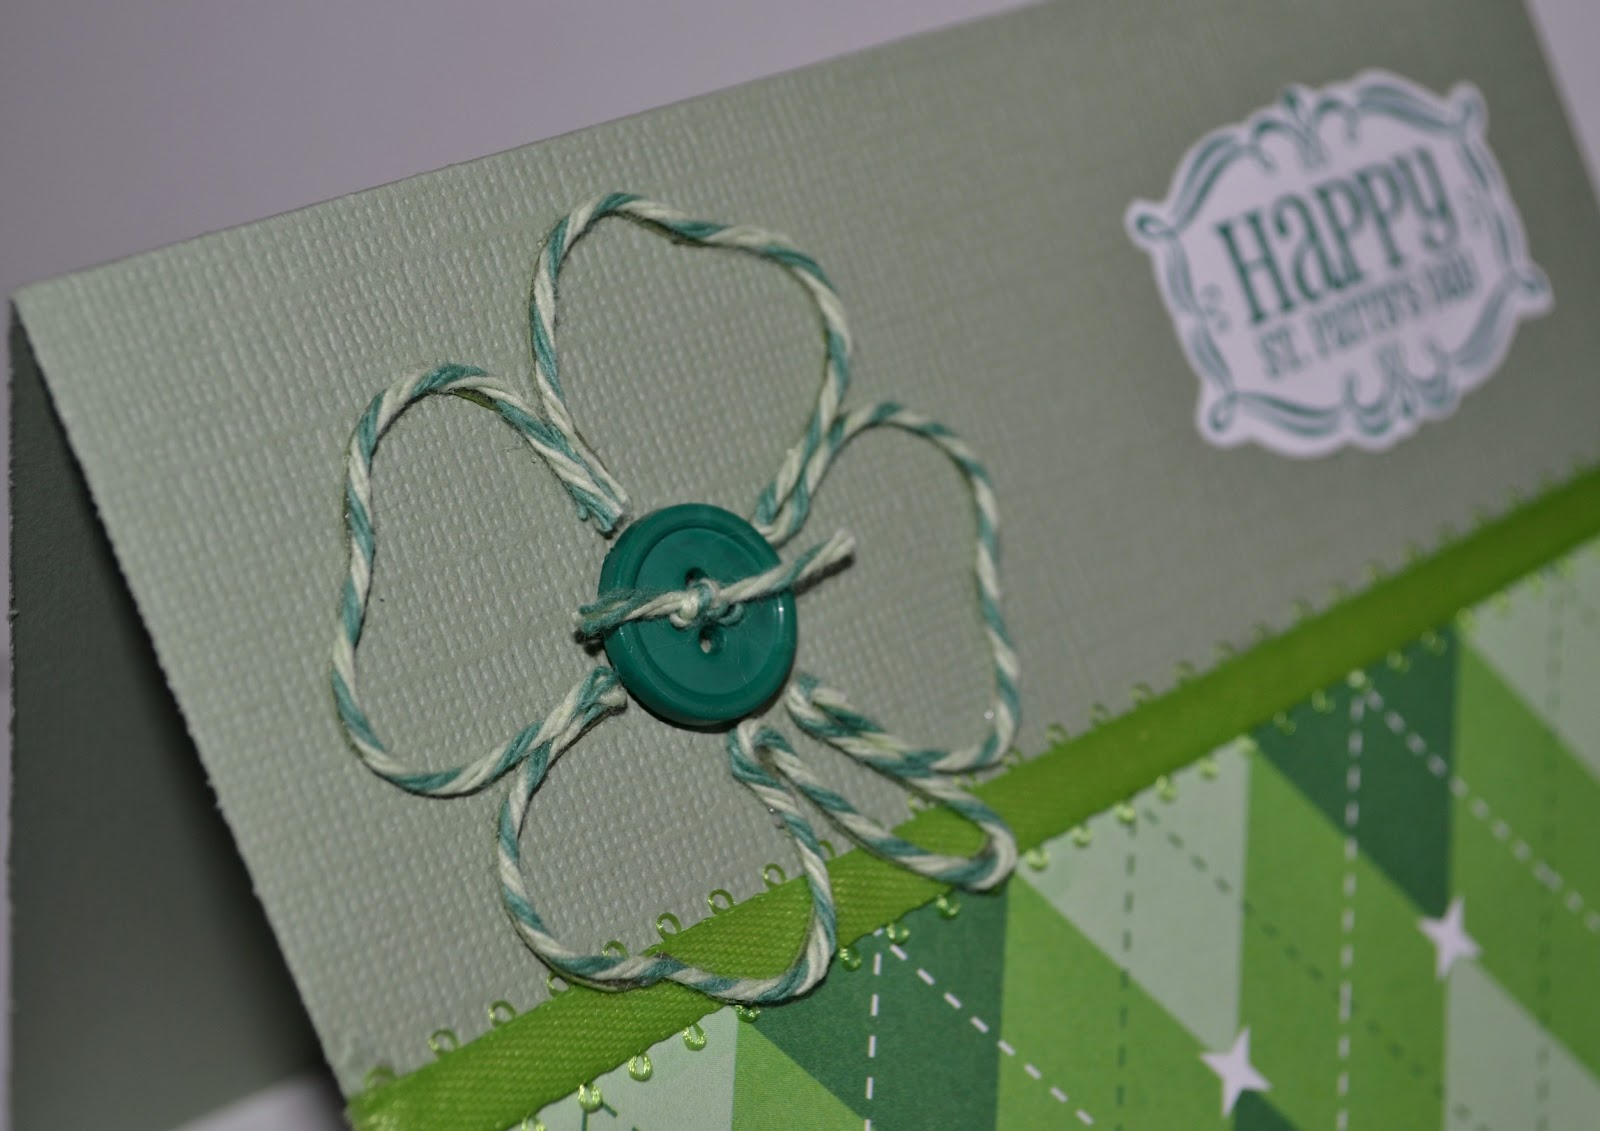
I used a thin outline of a shamrock I cut out with my Silhouette and Make the Cut as a template and lined it with the Twisted Lime twine so I would have a perfect shamrock rather than one I would have come up with which would have looked like a kid made it.
Check out Trendy Twine's blog for the rest of the St. Patrick's Day projects made and also for details on this month's challenge! Don't miss out on your chance at winning 50 yards of twine!!
Tuesday, February 21, 2012
Tasseled Bookmarks
Hello hello! Kasi here with my latest Trendy Twine design team project. My inspiration for this latest project is from something I love to do...read! The book nerd I am just never seems to have a proper bookmark on hand for those times when I actually pick up a "real" book and not my Kindle. I usually just grab an old receipt or whatever scrap of paper I can get my hands on to. I finally decided to make myself a pretty bookmark!


I used Trendy Twine's new Chocolate Cupcake twine for the tassel. Now usually when I make classic bookmarks like these I just throw on some ribbon or twine at the top but I never made a tassel before this. I had to do some hunting around and found this blog which I felt did a great job in demonstrating through pictures how to make a tassel.
Hope you enjoyed this project and learned a new way to use Trendy Twine!! For more great twine ideas visit the Trendy Twine blog!


I used Trendy Twine's new Chocolate Cupcake twine for the tassel. Now usually when I make classic bookmarks like these I just throw on some ribbon or twine at the top but I never made a tassel before this. I had to do some hunting around and found this blog which I felt did a great job in demonstrating through pictures how to make a tassel.
Hope you enjoyed this project and learned a new way to use Trendy Twine!! For more great twine ideas visit the Trendy Twine blog!
Tuesday, February 7, 2012
Trendy Twine Tuesday
It's a another fabulous Trendy Twine Tuesday where the entire Trendy Twine design team shows you their creations using a specific color of twine. The twine of choice for these projects is Strawberry Cupcake which is a pink and white twine. To get into a little more detail, the twine is 4-ply and is twisted with dark pink, light pink, and white.
My project, which I made for a friend's baby shower features both Strawberry Cupcake and Twisted Lime.


To see all the Trendy Twine projects visit Trendy Twine's blog which is linked HERE.
My project, which I made for a friend's baby shower features both Strawberry Cupcake and Twisted Lime.


To see all the Trendy Twine projects visit Trendy Twine's blog which is linked HERE.
Subscribe to:
Posts (Atom)