CLICK HERE FOR FREE BLOGGER TEMPLATES, LINK BUTTONS AND MORE! »

Tuesday, August 30, 2011

Another Set of Mini Note Cards

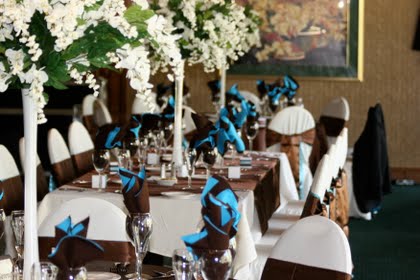
My favorite color is brown.  I know that may sound weird but for some reason it is.  My wedding even featured quite a bit of brown in it!

My love of the color brown is quite apparent here!

Wedding table set up


And here....


Me and my bridesmaids

 I am just in love with brown.  Awhile back I discovered kraft paper and ever since then all I ever want to do is make cards, projects, etc. with that darn brown paper!  Uhh, well lately I have been giving into that urge and making everything with it!  I can't stop.  Brown is so easy for me to work with.  I can match colors to brown easier than I can any other color combo.   With all this talk of brown kraft paper can you guess what the project I will post pictures of is?  The colors, paper, etc?

If you guessed brown kraft paper then you guessed right!  Woohoo!  You smarty pants, you!


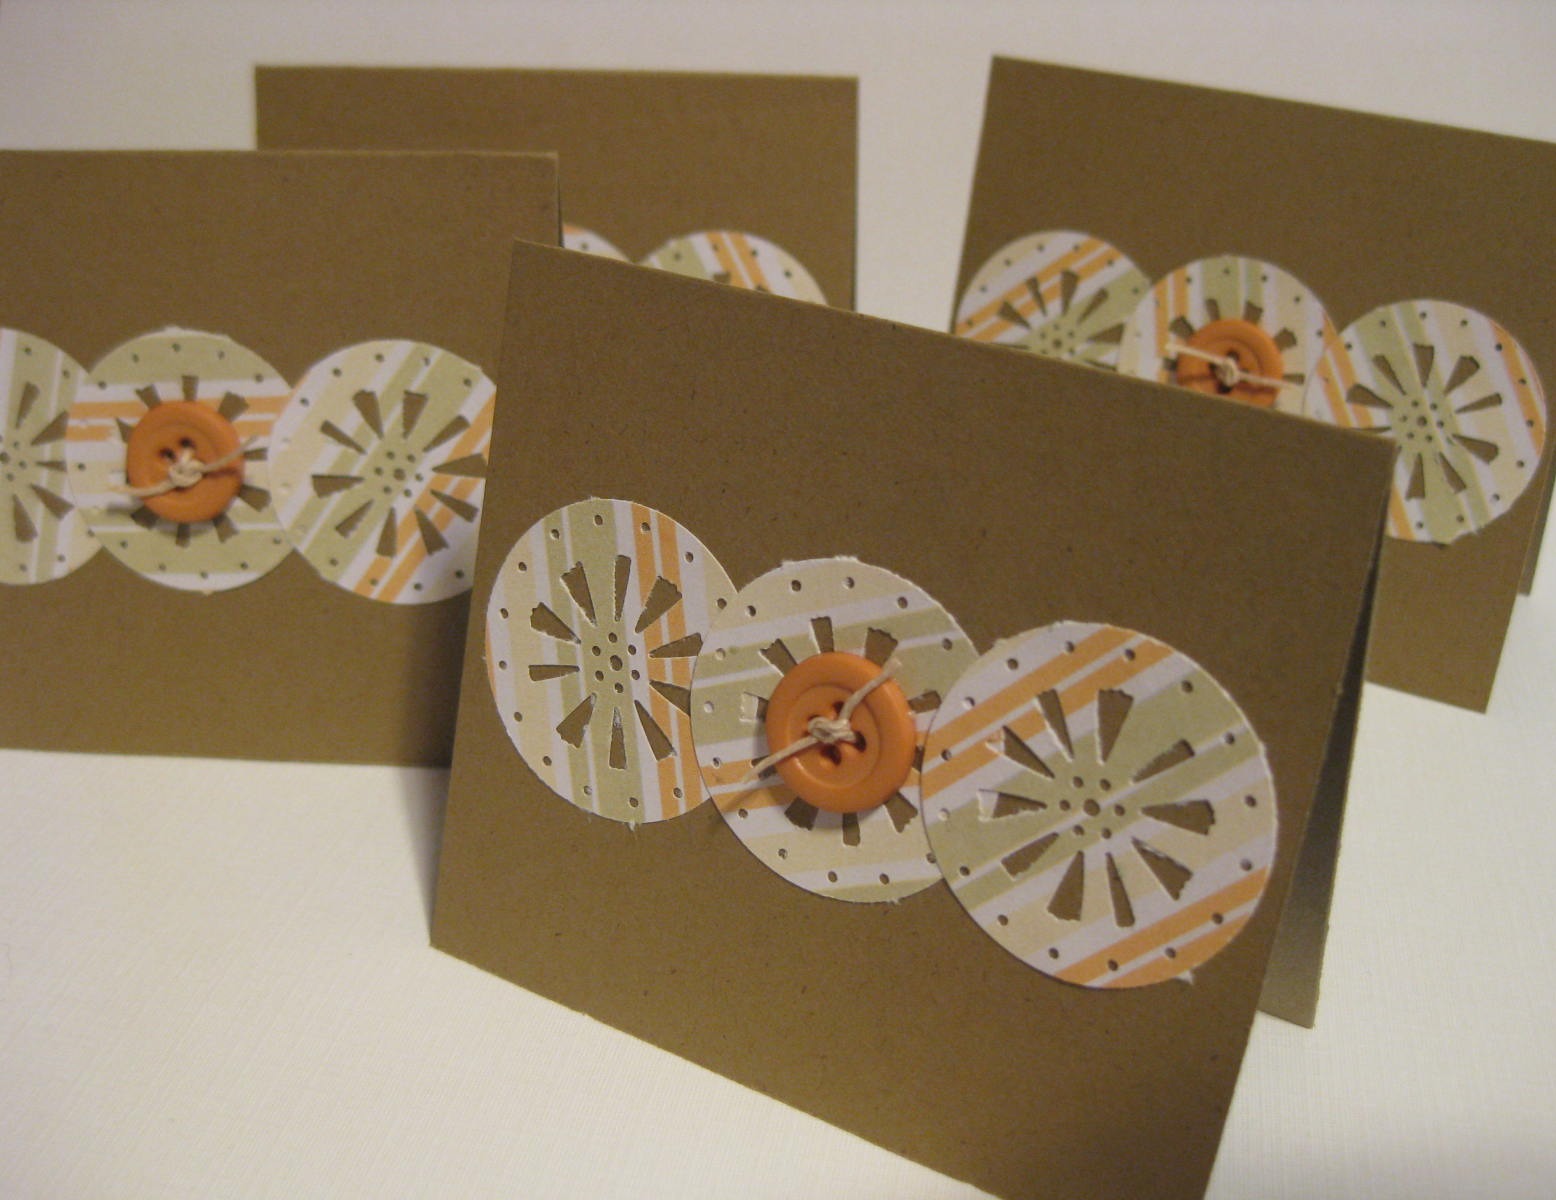
My cute and simple mini note cards!  I used a punch I had laying around that I knew would come in handy one day!  I really have no need for punches anymore...well, yea I do.  It's easier to punch out then set it all up on the Silhouette.  Don't cry Silhouette, I still love you!  Hmm, I just realized I haven't mentioned my Cricut yet...wonder why!?   *wink wink*   I set a button on the middle pinwheel and threaded some hemp through it and double tied it to make sure the sucker stayed. 

OK, so now that you know what my favorite color is and if you happen to be invited to my baby shower (if I ever decide to have another kid) remember this post so you get the answer right just in case it's on  game at the shower.  Got it?


Monday, August 29, 2011

Pendant Banner Card

I love how pendant banner cards look. They are so simple yet so pretty if done right.  I made one a few weeks ago by cutting and piecing together the pendants but this time I decided to try my had at designing my own pendant in Silhouette Studio. Ack, what was I thinking?!  I'm not a graphic designer!  I tried anyway. 

It actually wasn't too hard once I got the bowed line to look decent.  Once I got that part down I created some triangles and lined them up on the bowed line.  I removed the bowed line and welded the triangles together and and had my pendant!  I could have left the line but I decided against it and used twine instead to *hang* it.

Here's my lovely vintage-inspired card.


I used the print and cut feature in Silhouette Studio to cut the banner.  I used the Distrezz-it-All on the edges then went over it to smooth it out a little with the Tim Holtz' manual distresser.  I then lightly inked the edges, pendants, and twine to give the card an aged look.  I decided against a sentiment stamp this time around.  I like the look of it without one plus it can be used for any occasion without a sentiment. 

So what do you think of my first venture in graphic design?  Not too shabby for something so basic!

Mini Note Cards

I took a break from selling on Etsy for a few months and wasn't sure if I'd go back to it.  My sales were dismal there.  I was selling a lot outside of Etsy and not having to worry about fees but I was starting to get stressed with custom orders so I took a break from that as well.  This past week I had been considering starting up again but wasn't sure I should and then things started happening.  One person mentioned selling their handmade goods so it got me thinking.  Then another mentioned the items I make and then another person did as well all within a few days.  It pushed me to get back into it. 

I reassesed my items and came up with a new idea on what I should sell based on what I like and what I see people buy.  Simple and sweet is my new take on the items I plan on sellling.  I'm sure I'll throw in more intricate items but for now simple works.

Here is an example of a set of mini notecards that I absolutely love.  They are cute, simple, and classy.  Sometimes less is really more and I found that I wasn't following that saying before.


Mini Note Cards


Friday, August 26, 2011

Trick or Treat!

And here we are again.  Welcome back and thank you for coming to visit!  I hope you enjoy your stay.  Aside from my project I have a few other tid bits (is that one word?) to share with you.

First order of business, SVG Attic is holding a design team call.  Yea, Jessica got tired of us oldies and is looking for fresh new faces.  I am just kidding.  She loves us but she really is looking to expand her design team so that part wasn't a joke.  I know you all want to work with super cool Kasi (me).  Come on, you know you do!!  On a serious note though, go apply.  We are super cool and the most awesome design team ever (that's not a joke either)!  Promise!  Plus, you get free SVGs and get to participate in blog hops.  My only requirement for you is that you have a sense of humor.  Did that convince you yet?  Do you meet my requirement (that's not a real requirement)?  If so, head on over HERE!

Second, SVG Attic has been releasing mini SVG sets each time they reach increments of 100 on their Facebook fan page.  Head over there and "Like" them now if you haven't already and get in on a chance to get some cute free SVGs.

OK, now on to what you have been waiting for, my project!  Some background on it...the boss-lady (Jessica) said, "No more cards, think outside the box!"  So I did that...literally.  Hehe.  Really though she is totally fine with me making cards.  I stick to cards because I can always give them away to almost anyone.  With 3D projects I can never figure out who to make them for.  I know, a gift box or something but really I don't usually give out things like that.  Guess it's time to start, huh?  Well, thanks to Jessica I have actually come to enjoy making 3D paper things.  Today's project is my very first SVG box and first Halloween project of the year!  I know...already, right?!     


Front

Back

Wooden door (embossed)


Trick or Treat!!
I'm proud of my first box err, milk carton.

This spook-tacular milk carton gift box measures 5 1/2" tall.  In MTC I sized it so the carton stayed proportionate.  I used SVG Attic's Raven Claw Manor  SVG kit for both the haunted house and the tag.  The house is actually a box in the set but I played with it and just used parts of it so I could attach it to the milk carton from the Fun Favors SVG Collection.

I embossed both the roof and the door.  Didn't those two pieces come out super cool?  I really love embossing things.  It adds so much more umph to projects.

The tag was actually a card in the Raven Claw Manor collection but I decided to make it into a tag for this project.  I used a stamp I bought in the dollar bin last year from either Michael's or Joann's.  The "or" got wet so the ink kinda splatted and I had to write it in...oops!

I used my Crop-a-dile to set the eyelets on the top of the milk carton and I tied it with some spooky orange and black twine from Trendy Twine.  Word on the virtual street known as Facebook is that they are coming out with two new colors of twine!  Keep on the lookout for those.

Last bit of news.  There's going to be a few blog hops I'll be participating in within the next few months.  I've never been in one so I'm stoked!  Woohoo!  See, yet another reason to try out for the SVG Attic design team!


Saturday, August 20, 2011

Flying high!

I am one of those people who makes cards but never seems to have cards ready for special occasions such as family birthdays!  I am horrible at making cards when they *need* to be made.  Seeing that I am a procrastinator I ran into that exact situation today.  It's my father-in-laws birthday and we're headed to his party later this afternoon but of course since I procrastinate I had to get my butt in gear this morning and make him a card.  I wanted something simple with little piecing together.  Thankfully I have the perfect machine to help me with that!


I used the print and cut feature in Silhouette Studio to make the hot air balloon.  The balloon came from Lettering Delight's Around the World graphic set.  I found the clouds in the MTC gallery.  The sentiment comes from the My Thoughts Exactly Under the Sea stamp set.  I used Tim Holtz' Tumbled Glass distress ink to stamp the sentiment.  I used the Sizzix Plaid and Snowflake embossing folder to emboss the basket of the hot air balloon.  Another super awesome tool I used was the Crop-a-dile to set the eyelets.  What would I do without all these super cool tools!?

Did I ever mention how much I adore my Silhouette?

Sunday, August 14, 2011

Back to School

I am just in time for back to school with my latest project.  Sometimes I tuck little surprises into my daughter's packed lunch or in her backpack for her to find.  She really enjoys getting them and it's a way to perk up her day.  With that being said, today's project is for the purpose of doing just that. 

My daughter starts school tomorrow so I barely made the deadline!  I stayed up late rocking out to Pandora on the Rolling Stones station (I should have been born a few decades earlier I think), reminiscing with my old military buddies on Facebook, and working on the little lunchbox notes to make the deadline!. 

The cute little shaped lunchbox notes were created using SVG Attic's Back to School SVG collection. 

Lunchbox notes

Lunchbox, front opens up for a surprise message!

Ribbon, the flap swings up to reveal a cute little message

Crayon, shaped card that opens up to a message

Chalkboard, scrawl a message onto the chalkboard using a white or silver gel pen
I love the diversity of them!  I purposely made each one with a different style to reveal the message.  It makes it more fun. 

Quick note on the chalkboard notecard.  I used the print and cut feature in Silhouette Studio for the chalkboard with the writing.  For the chalk-looking writing I used the "pencilPete" free font found HERE

Hope you enjoyed my latest project using SVG Attic's SVGs!  

Friday, August 12, 2011

A Little Tea Party Fun

It's another design team Friday for me at SVG Attic.  I enjoy my DT days!

My mother-in-law inspired today's project.  She is a pretty hardcore crafter so I know she can appreciate anything I make for her.  It's her birthday next week so I decided to make her a birthday card and feature it as today's design team project. She's the girly girl dainty type so I wracked my brain to come up with something that would fit her personality.  Something flowery and girly is what I needed.  I came up with a tri-fold shutter card with a tea party theme.

I am pretty tired of making basic cards so I have been experimenting lately with making different styles of cards.  I am having so much fun with it.  Today's project features a tri-fold shutter card.  This is the first time I've made this type of card.  I think it's my favorite type so far.  I'll bombard you with pictures before all the details!  Ready to Ooh and ahh?  Just kidding.


You like?  I really like it.  It's a fun card to make and there's so much you can do to design it.  I kept mine pretty simple.

The card measures 5 1/2' x 12"....that's the basics.  I forgot to measure all the rest of the card before I mailed it out!  So sorry!  I can make a tutorial of how to make a tri-fold shutter card if you would like.  Just let me know! 

All the SVG files I used are from SVG Attic.

I used the Vintage Patriotic Cupcake Wrappers for the star fleurette on the front of the card and placed it atop two paper flowers with a paper flower sitting on top of it.  I finished that piece of with a button and twine from Trendy Twine.   

The tea pot, stack of teacups, and the cream colored tag in the middle are all from the Mad Hatter Tea Party collection.

The bows that are on the little panels are from the Classic Wedding collection. 

Oh and guess what I finally did?  I used my Sew Easy!  I have had it about a month now!  I am so bad at buying then not using what I buy for a long time.  I just did the basic straight stitch on this card.  I used the Rustic Stack from DCWV for the paper on the base of the card and open stock paper for all the decor inside.  Oh and the last little bit is the clock.  I wanted to use the clock from the Mad Hatter tea Party collection but I was worried it would be too small so I decided to stamp the clock from a stamp set I have and hand cut it out.  

Hope you enjoyed that card!  I am definitely going to be making more tri-fold shutter cards in the future.  They are fun to make and get!

Check back in a few days for a back to school project I will be working on!